Showing posts with label recipes. Show all posts

Sunday, January 10, 2016

Aloha Sunday Update


Happy Sunday to you!

I see a lot of snow on Facebook, so I'm feeling the winter, long distance.    I even made this Chicken and Wild Rice soup in solidarity.    

Here are just some of the interesting things that you can read, cook, ponder or sing along with this week:

I don't know about you, but the Tatum vs Tatum Lip Sync Battle was, by far, the BEST thing I saw this week.    Watch it once.   Then watch it again for good measure.   If you want some more jams, might I suggest the 2015 Pop Danthology part 1 and part 2?

In 2006 I started volunteering for the Colorado Bike MS.   In 2008 I started riding my bike 150 miles each summer while raising money.   In 2011 MS became personal in our family.  Watch  this video about creating a bike that has some of the physical symptoms of MS.

'Tis the season for goals and resolutions.   Instead of wishful thinking or slaving at the gym every day for a month, focus on building habits that can last a lifetime.   Habits:  getting regular exercise, incorporating fruits/veggies into each meal, saving/investing x% of your income, calling your family, reading a book, getting a good nights sleep.     Here you go:  "Your Goals Are Overrated."

Speaking of habits....use your vacation time.   My favorite sentence of this article:  Zero.  The number of people who said "I took too many holidays this year."

Well....these two recipes have fruits and vegetables, so it can be part  of your 2016 eating habits, right?   That's my plan anyway.    Let's have some peanut and coconut noodles and raspberry cream cheese coffee cake, shall we?

Have a great week!


Thursday, September 20, 2012

Traveler in the Kitchen Update - September 20

Stay hungry my friends....


Here are some of the new things I've posted over on Traveler in the Kitchen recently:

What I've made

Spanakopita

Fresh Tomato Salsa

Peanut Butter Banana Bread

Toffee Cheesecake Bars

Peanut Butter Nutella Cookies


Tasty treats while traveling

24 Diner - Austin, Texas

Mouse's Chocolates - Ouray, Colorado

O&H Danish - Racine, Wisconsin


What's the best food you tried this summer?


Friday, July 6, 2012

Traveler in the Kitchen Update - July 6


In spite of visits to Lake Tahoe, mission trips to Missouri, and a long two day bike ride - good things have still been coming out of my kitchen.    Click on the links to hop over to Traveler in the Kitchen to learn more about these "Taste of Awesome" recipes!


Not to mention my new found love of Braum's Ice Cream!  

Sunday, February 12, 2012

Recipe: Coconut Toffee Bars


I didn't have a specific plan to make these.   I didn't see the recipe somewhere and bookmark it or print it out for a future sweet treat occasion.   Rather on Thursday night I wanted to make something to take with me to visit friends.    I still had some Bits O' Brickle from my second time making the Cinnamon Toffee Blondies.   On the back of the package was a recipe for Chewy Toffee Almond Bars.    Sadly, I didn't have any plain almonds, only BBQ flavored and that wasn't a taste combination I was willing to try.   So I axed the almonds and added some almond extract to the base layer and was good to go.   If you have almonds, check out the original recipe and know that it goes in the same places the coconut goes.

What you need
1 cup butter/margarine, softened
1/2 cup sugar
2 cups all purpose flour
1 teaspoon almond extract
1 1/3 cups Bits O' Brickle toffee bits
3/4 cup light corn syrup
3/4 cup sweetened coconut flakes

What you do
Heat your oven to 350.   Line a 13x9 pan with foil and spray with cooking spray.  

Beat butter and sugar and almond extract until fluffy.   Gradually add flour, beating until well blended.  Use your floury hands to press the mixture into the bottom of the pan.    Bake 15 minutes until edges are lightly browned.

While the base is baking, mix corn syrup and toffee bits in a small saucepan, heating and stirring until the toffee bits are all melted.   Add 1/2 cup of the coconut to the mixture and then pour the toffee mixture onto the baked crust.     Sprinkle remaining coconut on top.

Bake an additional 15 minutes or until bubbly.  Cool completely in pan, then cut into bars.

Walk Softly and Carry a Sharp Knife
I let these cool on the counter overnight and in the morning when I pulled them out of the pan to cut them, I had a problem.   The toffee layer was pretty hard and it was a challenge to cut them.   However, once I had them cut and in a Tupperware container they softened a little bit.  By the time we enjoyed them with some red wine in the evening, all was well, just watch out for crumbs.    Also delicious with your Saturday morning coffee. 

Saturday, February 11, 2012

Superbowl Strawberries


This post should receive a penalty for delay of game.   Inspired by a picture I saw somewhere last week, I made these chocolate dipped strawberries for last Sunday's game.   I really don't care about the Super Bowl, but I do like eating pizza with friends.   Our approach to the big game?   Playing games and watching the commercials.     Our host introduced a game called Wise and Otherwise.   The goal?  To create plausible endings to proverbs and sayings from around the world.   An old Cameroonian saying, "If you throw a squirrel in water...."  You make up an answer and everyone votes on what they think the really saying is. 

These strawberries are easy to make.    This time of year the strawberries aren't especially pretty, so it's better for everyone involved to coat them in chocolate.

What you need
1 pound strawberries, washed and dried
1 cup chocolate chips
1 tablespoon oil
white candy melts or white chocolate chips for the laces

What you do
Melt -chocolate chips with oil in a microwave safe bowl, stir until smooth.    Dip strawberries in chocolate to coat, allow extra chocolate to drip off into the bowl.    Set finished strawberry onto wax paper to cool.

To put the laces (or any other design), I melted 6 or so white Wilton candy melts in the microwave and then put the melted candy into a small ziploc bag.  Cutting a tiny hole in the corner I used it as a makeshift (and disposable) decorating bag to draw the laces.    Let your friends oooh and aaah.   Then eat.

Saturday, February 4, 2012

Cereal Bars - Take 1


I am lazy in the morning.   Even pouring a bowl of cereal is really more than I'm capable of doing  before 8am in the morning, so when I'm getting ready for work at 6am, it's got to be hand held. Bananas are the ultimate handheld.  I also really like Clif, Luna, Lara, and Odwalla bars.  The downside?  That they are usually at least a buck a piece at the grocery store.   If they are more than a dollar, I won't buy them, but if they are on sale for 88 cents a piece?  I consider that a shopping victory.   

I've been tempted to try and create my own version of a breakfast bar.   This was my first attempt.   Not too shabby if I say so myself.     It also gave me an opportunity to use some Colorado local products that I bought on road trips last fall.


What you need
3 cups honey nut O's (I used some brand made with wind energy that was on sale for $1.50/box)
1 cup  honey nut crunchy peanut butter
1/2 cup of Honeyville Maple Hazelnut whipped honey (warmed in the microwave for pouring)
1/4 cup oats
1/4 cup shredded coconut
1/4 cup pumpkin butter
1/8 cup ground flax seed
dash cinnamon
splash vanilla

What you do
Mix the honey and peanut butter together in a bowl.  Mix in all other ingredients and work together with a spoon or your hands until all cereal and oats are incorporated into the mix.     Press mixture into a 9x13 pan lined with foil and sprayed with cooking spray.   Refrigerate until firm.   Pull foil out of the pan and cut into squares.

What I will do next time
I think that I will melt the peanut butter and honey (and pumpkin butter, if I use it) in a sauce pan to bring it more to a liquid consistency.  It may help evenly coat the bar ingredients and hold them together better once they've cooled.     This really was just an experiment seeing if I could use ingredients I already had on hand to make a tasty morning snack.

Denver makes the news
When the weather is the top trending topic on every local media outlet as well as on CNN and the Weather Channel, you know it's a big deal.   There is even a twitter hashtag #snOMG.    It started snowing on Thursday night and continued through this morning.    My sister put the "weather ruler" on top of the air conditioner outside yesterday and it was covered this morning, so we got at least a foot.    I didn't get a snow day yesterday, so I'm adopting a snow day attitude today!   Hello lazy.

Wednesday, February 1, 2012

Recipe: Avocado & Grapefruit Relish


Dear Grapefruit,

It's been a while.   A long while.   I go to the store and walk right past you to get to the bananas or the blackberries.   I've forgotten how good you are.  Sweet and tangy at the same time.  A nutritional win any way that I look at you.   I promise I will put you back into my fruit rotation.

Love, Jenni

I found the recipe, Spiced Turkey with Avocado-Grapefruit Relish, at Sunflower Market, a grocery store here in Denver (and elsewhere in the western half of the country).   I didn't have turkey cutlets. I did have frozen, store-bought, turkey burgers, and sandwich thins, so I opted to use the relish with a  burger.    The relish is so good that you can eat it straight out of the bowl, like my sister did with the leftovers tonight.    Put it on everything.  Or nothing.  

What you need
1 large ruby red grapefruit
1 small avocado, peeled, pitted, diced
1 small shallot, minced
1 tablespoon fresh cilantro, chopped
1 teaspoon red wine vinegar
1 teaspoon honey
pinch of sea salt

What you do
Slice the grapefruit in half.  Use a sharp knife to cut out all sections - don't get any of the white pith or the dividing membrane.   Dice the grapefruit pieces and put into a medium bowl and squeeze remaining juice in the bowl as well.   Add avocado, shallot, cilantro, vinegar, and honey.  Toss well to combine. 

The turkey burger was improv, but I sprinkled the patty with chipotle chile powder, sea salt, and dried parsley then put it on my little George Foreman grill for a few minutes.  

Sunday, January 29, 2012

Recipe: Spicy Thai Tuna Salad

Volunteering in Thailand

I love Thailand.  

In the summer of 2008, I had a master plan.   I wanted to take a month off work to travel and do international volunteer work.   I proposed it to my manager - I had 3 weeks of paid vacation and would take another week unpaid.  His response?  Check with my co-workers since they would cover my work while I was away.   They gave me the go ahead and I never looked back.    I chose to volunteer with Cross Cultural Solutions for three weeks in southern Thailand and I had some time for travel before, after, and on the weekends.   If you want more information, click the Traveler Abroad page above and scroll down to Thailand 2009.   

Part of loving Thailand is loving the food.   I ate non-stop for a month and came home 7 pounds lighter.  I'm going to say it was the heat, combined with eating a lot of fresh fruits and vegetables and very limited processed food (although garlic soft-shell crab potato chips are pretty good).    When I came back from Thailand, I gave the H-Mart, the "big box" Asian grocery store here, a more thorough exploration.   The pricing on fruits, vegetables and spices is very reasonable.    You can find a bunch of fresh basil or mint for 50 cents.  

I have a fantastic Thai cookbook, Quick And Easy Thai, by Nancie McDermott - and adapted today's lunch from that cookbook:  Spicy Tuna Salad with Chilies and Lime.  Next time, I'll have to make a bigger batch.

2 5oz cans of tuna in water, drained
3 tablespoons fish sauce (this is what adds the salt to this recipe, you can always start with less and add to taste)
3 tablespoons freshly squeezed lime juice
1 tablespoon sugar
1-2 tablespoons thinly sliced shallots (I didn't really measure)
1 tablespoon minced fresh ginger
1 tablespoon coarsely chopped roasted, salted peanuts
1 teaspoon Asian chili paste (to taste)
2 tablespoons coarsely chopped fresh cilantro

Combine all ingredients in a medium bowl.   Mix gently to season the tuna and break it into smaller chunks.   Cover and chill until ready to serve (then garnish with cilantro, lime wedges and more peanuts if you'd like).   I enjoyed mine on an Orowheat Whole Wheat Sandwich Thin.  

Chili Paste from the H-Mart - the label is all in Korean.  
Thankfully, the prices on the shelves had a little English.

Spicy Tuna Salad on a Sandwich Thin
Yum!

Saturday, January 28, 2012

Recipe: Buffalo Chicken Chili


Yesterday I saw an awesome recipe for Triple Chocolate Brownie Pie.  There is no way that I can justify making that...at least right now.   So I've been scouting for entree recipes that incorporate more fruits and veggies (and an occasional whole grain if I'm feeling particularly nutritious).    I'm on the Betty Crocker email list and they sent a link to their Best of 2011 recipes.    Not surprisingly they are mostly desserts.   But I found this recipe in the mix.

I love buffalo chicken in almost any form.   Chicken wings have too much wing and not enough chicken for me, but boneless wings (an oxymoron if there ever was) or buffalo chicken sandwiches/wraps....mmmm.    Buffalo chicken doesn't have to be a calorie killer, if you focus more on the hot sauce and less on frying and mad quantities of blue cheese or ranch.    This is an crockpot recipe.   If you do it overnight, you'd better like the smell of chicken chili in the morning. 

Adapted from Betty Crocker

Spray your 5 to 6 quart crockpot with cooking spray.   Combine all ingredients below and then cook on low for 8-10 hours. 

5 boneless skinless chicken breasts cut into 1 inch pieces
1 large yellow onion, chopped
2 medium stalks celery, chopped
1 cup chopped carrots
1 28oz can of diced tomatoes, undrained
1 15oz can of black beans, drained
1 cup chicken broth
2 teaspoons chipotle chile powder
sea salt and seasoning salt to taste
1/4 cup hot sauce or wing sauce (I added it in the beginning, the original recipe has you stirring it in just before serving)
1 teaspoon white vinegar (added in the last few hours just to balance the flavor)

Light ranch dressing, blue cheese crumbles, and celery sticks for garnish.   The blue cheese crumbles really tied the whole thing together.   Enjoy!

Recipe: Cinnamon Toffee Blondies

First, a shout out to my co-workers who gave me a gift of colored plates for my birthday.   So many more options for my food photography.   And possibly more treats for them too.  

This recipe is courtesy of Lauren from her blog Keep It Sweet and it was featured as a guest post on A Culinary Journey with Chef Dennis.    I followed the original recipe as posted...except for some modifications due to a lack of cinnamon chips. 

Where have all the cinnamon chips gone?  (You can sing this Peter, Paul & Mary style.  Go ahead, try)  This recipe calls for cinnamon chips and my local King Soopers doesn't have them.   In talking to a friend about this baking crisis, she said that she would see them in the stores when she lived on the East Coast.   She also said she has a hookup in the ability to get any Hershey's product she wants.  Including these.   I admit that I didn't check more than one grocery store, so it could be that there are cinnamon chips in Denver, but that I didn't look hard enough.    So I doubled the amount of cinnamon in the recipe from 1/2 teaspoon to a full teaspoon and was not disappointed.   

The other ingredient of question was toffee bits.   Now, sometimes I see the bags of Heath or Skor bits, but I don't know if that's what was originally intended.  And I couldn't find them the day I was at the store.  Can you buy toffee bits without chocolate?  So instead I bought a bag of Heath miniatures (actually cheaper per ounce than buying a 6 pack of regular size bars) and chopped up 20 of them which provided about a cup of toffee bits. 

Are they really Chewy Gooey?  Yes.  So much so that gettting them out of the pan, even lined with foil and sprayed with cooking spray, took a little effort.  And I was impatient, wanting to try them while they were still warm.   Lots of love from my friends on the ski trip for these.   And when I left Breck on Sunday afternoon I left the remainder for the crew staying until Monday.   Why?  Keeping them out of my kitchen so that I don't sabotage my attempt at healthier eating more than I already have.

Cinnamon Toffee Blondies - Second Batch
My sister scoured a couple different grocery stores, finally finding both cinnamon chips and Hershey's Bit O' Brickle at an Albertsons on Mississippi.   I made a second batch, partially as a bribe to one of her friends and the other for her office (not bringing any to my office, since we're just one month in to a three month weight loss challenge).   These were even better than the first batch.  I baked them for about 40 minutes and WOW!

Sunday, January 22, 2012

Recipe: Saltine Toffee


This is not me falling off the wagon, I promise.  I'm still committed to the 95 Days of Glory (although the past two days have made that the 93 days...).   I used the ski trip this weekend as my excuse to try some new sweet recipes that are not part of my healthy eating plan.   But I didn't have more than a sample, and today left the remainder in the mountains for my friends staying over until tomorrow.   So selfless. 

I've tried saltine toffee once or twice, but never really looked into how to make it.    Inspired by a recipe that I saw in Taste of Home, I made it for ski trip snacking.

Take your 15x10 inch jelly roll pan and line with foil.    Preheat your oven to 350. 

Ingredients:
40 saltines - pretty much a whole sleeve
1 cup butter/margarine
3/4 cup sugar
1 1/2 - 2 cups semi sweet chocolate chips
1 cup pecans, chopped

What to Do and When to Do It:
Arrange saltines in a single layer on the foil.   I ended up breaking the crackers in half to fit the last spaces.   In a large saucepan over medium heat, melt butter.  Stir in sugar and bring to a boil.  Cook and stir for 1-2 minutes until sugar is dissolved.  Pour evenly over crackers.   I can tell my pan was a little bowed, because I needed to tilt the pan a little bit to get all crackers evenly covered.    Bake for 8-10 minutes (next time, I'll probably go a little longer...that whole bowed pan meant that sugary, buttery goodness didn't cook as evenly as it should have).   Once pan is removed from the oven sprinkle chocolate chips and allow them to melt.  Use a spatula to smooth melted chocolate and then sprinkle with chopped pecans.    Allow to chill in the fridge for at least an hour (longer is better for us bowed pan girls) and then break into pieces and store in an airtight container until every last morsel is consumed.

I need more ski trips to justify my baking habit.

Saturday, January 7, 2012

Chicken & Tortellini Soup


This whole trying to eat healthier goal is already challenging, and it's only day 5 (of the 95 days of glory, that is).   Just minutes ago I found a recipe for Cinnamon Toffee Blondies.   They look delicious and I can't wait to try them.   In April, that is.   In the meantime, I'm trying to steer my love of cooking from the channel of chocolate to the sea of salad.   So I'm looking for recipes and dishes that I won't be ashamed to put in my food journal.   

Ingredients
6 cups of water
5 chicken bouillon cubes
25 baby carrots cut into smaller pieces
2 cups frozen cheese tortellini
1 1/2 cups of shredded cooked chicken
1 can cannellini beans (rinsed)
salt, pepper, sage, thyme, and parsley to taste

In a large saucepan simmer the water and bouillon until dissolved.    Add the carrots and simmer for 12-15 minutes until tender.     Add the tortellini and simmer until tender 4-5 minutes.   Add the chicken, beans and spices and simmer for another 5-10 minutes.     Enjoy!

adapted from Real Simple

Random Small Victory:
Today at the gym I told my trainer that I bought smoked almonds.   He told me that I should return them because they have high fructose corn syrup.   I said no.   When I got home I checked the label.  No HFCS in sight.   Jenni - 1point.  Trainer - 0.  

Tuesday, January 3, 2012

My Favorite Fruit Dip


After my first year of college, I had a summer internship with a local university working in food service and catering.    I don't remember anything else from that experience (other than the stylish red and blue polo shirts) other than this fruit dip.     Three ingredients and it's a winner each time.    And now that I'm trying to commit to healthy eating as a part of the 95 days to glory (1 day down, 94 to go) this recipe helps me keep my sweet tooth in check without jumping off the deep end....into a vat of cookie dough, for instance.   

1  8oz block of reduced fat cream cheese, room temperature
4 tablespoons brown sugar
1 teaspoon vanilla

Combine all three ingredients in a mixing bowl and beat with a hand mixer until smooth.    Spoon into a bowl or a hollowed out piece pineapple (or grapefuit, or orange) and dip all those nutrition-packed fruits you love.  In moderation of course. 

Happy New Year!

Tuesday, December 27, 2011

Recipe: Macaroon Kisses

I finished my holiday baking last week. This was the final recipe out of my kitchen for Christmas 2011. One day, I looked in my cabinet and said, “Why do I have 3 bags of coconut?” It’s rare that I have extra of anything. This much coconut could cause a crisis. The crisis was averted through the baking of Macaroon Kisses.
Macaroons are sticky. There is no escaping it. Every time I make macaroons I end up with coconut stuck everywhere. If you are using a standard cookie sheet, you can line it with foil (greased and floured). I skipped that line in the instructions and needless to say, if you don’t grease and flour the foil, there is coconut stuck everywhere and sad looking macaroons that are missing half their parts. Moral of the story: Use your silicone baking mats and avoid calamity.

1 14oz can sweetened condensed milk
2 teaspoons vanilla
1 to 1 ½ teaspoons almond extract
5 1/3 cups flaked coconut
48 Hershey’s kisses

Preheat oven to 325. Line your baking sheets with foil (greased and floured) or with your silicone baking mats. In a large mixing bowl, combine milk and extracts. Stir in coconut. Roll coconut into balls and put on cookie sheet, flattening slightly. If you keep you hands wet/damp with water the coconut will not stick to you as badly. Bake 15 to 17 minutes or until golden brown. Remove from oven. Immediately press kiss into the center the macaroon (a piece of York Peppermint Patty is also delicious). Remove from baking sheet and cool on rack (or greased wax paper). Store loosely covered at room temperature.

Wednesday, December 14, 2011

Hooray for Buffalo Chicken Dip

I'm not sure how I've gotten this far in life without knowing that Buffalo Chicken Dip exists.   I like wings, I like hot sauce, I like buffalo chicken sandwiches and buffalo chicken pizza.    I was happy to find this recipe on From Cupcakes to Caviar.  Janet certainly knew what she was about with this recipe.   Click on over to her blog and take a look at the simple delicious awesomeness of this dip.    I laughed at her picture because she's right...it's hard to take a picture of dip.    A picture couldn't do it justice anyway.  Prepare it in advance and stick it in the fridge.   Throw it in the oven when you're ready.   Then dig in.

{GIVEAWAY CLOSED}
**OXO Good Cookie Spatula Giveaway!  This has nothing to do with buffalo chicken dip, except that you could use the spatula to shovel this dip directly into your mouth.    Thursday December 15, is the last day to post a comment here to win a new spatula of your own (and support a good cause).

Tuesday, December 13, 2011

Why I Love Homemade Peanut Butter Cups

Don't forget that this Thursday, December 15 is the last day you can enter my OXO Good Cookie giveaway.  Click here for the details - all you have to do is post a comment on the Good Cookie post about your fave holiday treat!


I could have been 5 years old or 20.    The drill was the same.   Anytime we visited my grandma, my sister and I would sneak to the basement and look in the freezer.  October through December was the optimal time for this search, but sometimes we would luck out, even in the summer.   For any kid with a sweet tooth the freezer was a gold mine.    In assorted Christmas tins would be spritz butter cookies, cordial cherries, candy Christmas trees, toffee, and peanut butter cups.   She would give tins of candy and cookies to her neighbors, her hairdresser, and her friends.   Whenever I do the same, I feel like it really is a family tradition.     

My grandma loved Christmas.   Our stockings, embroidered by name, would be hung on the staircase.   A tree with just animal ornaments would be in the kitchen picture window.   There was a tree in the living room and the family room.   Uncle Holly and Aunt Mistletoe figures would be hanging from the light fixtures.   My memories of her house at Christmas are some of the most vivid ones I have of Christmas as a child.  It was a sad Christmas Day in 2007 when she passed away.   But after that year, the sadness returned to joy.   She loved Christmas.   Our joy in the holiday can only honor her life.

My grandma was the only person I knew who made her own peanut butter cups.  This recipe may not be the exact same, but it is pretty close.   Get ready to spread your own Christmas cheer this year.

Peanut Butter Filling
3/4 cup creamy peanut butter
1/4 cup butter/margarine, softened
1/2 cup powdered sugar
1/4 teaspoon salt
1 teaspoon vanilla

Mix all filling ingredient together until smooth.   You can chill for 15-30 minutes to make the filling easier to form into patties.  Line a mini-muffin pan with festive holiday liners.   My pan has 24 openings.  

Milk Chocolate Coating
Melt 1 cup of milk chocolate chips with 1 tablespoon of oil on low heat in the microwave until melted then stir until smooth.   I melt 1 cup at a time just so that it doesn't cool while I'm working with it.    With the PB filling above (and probably 2 bags of chocolate chips) I made about 36 cups. 

Once your chocolate is melted, spoon enough chocolate in the bottom of each muffin cup to cover the bottom.   If you are feeling industrious, use a small decorating paint brush to brush some chocolate up on the side of the liners (about halfway up).    Place mini-muffin tin in the fridge for the chocolate to set.  It should only take 10 minutes or so.  

Take the peanut butter filling and shape into small flat-ish discs (how's that for a definition?).   You don't want the peanut butter center to touch the edges of the muffin cups.   Once the chocolate has set in the muffin cups, place a peanut "disc" into each muffin cup.   Top each cup with enough melted chocolate to cover the peanut butter completely and to get a smooth top (rather than a chocolate covered bump).   Put the peanut butter cups back in the fridge until the chocolate sets.   Store in a Christmas tin of your own.   Goodwill sells them this time a year for under a dollar.    Peanut butter cups freeze well and will be a special treat for your family when they scavenge in your freezer when you're not looking.

Wednesday, December 7, 2011

Perfecting the Peppermint Martini

After my great success with the Pumpkin Spice Martini last month (at a baby shower, no less), I decided that I should work on a Christmas themed martini too.   Peppermint is one of those flavors that takes you to a certain, time, place or season.   Coffee shops and bakeries are very deliberate on when they release their peppermint flavored treats to tie in the with joy of the season.   Last year it was almost a crisis at Christmas when we went to multiple grocery stores and they were sold out of peppermint ice cream.  

Mix equal parts in a martini shaker with ice:
-Vanilla vodka
-Peppermint schnapps
-Cream or Half and Half

Then add a splash of peppermint coffee creamer.   Shake until cold.   Rim your martini glass with the same red sugar sprinkles you use for decorating Christmas cookies.  Strain the martini into the glass.  Garnish with a candy cane and red sugar sprinkles.  Cheers!

In non-martini news, I'm hosting an OXO Good Cookie giveaway until December 15.  Click here for details. 

Recipe: Lemon-Coconut Snowballs


It is snowball season.   We had our second snowfall this past week - again people don't remember how to drive slowly with caution.   These are happy snowballs - perfect for your Christmas cookie tray.  Or any other time you want to zest a lemon.   Someday, I will own a zester (hint: Santa), but until then my grater works just fine.
 
What You Need
 
1 cup butter/margarine, softened
1/2 cup powdered sugar
1 teaspoon coconut extract
1 teaspoon vanilla extract
2 1/4 cups flour
1 1/2 tablespoons grated lemon rind
1/2 teaspoon salt
1 cup sweetened flaked coconut, lightly toasted
1 1/2 cups powdered sugar

What You Do
 
Beat butter/margarine at medium speed until creamy; gradually add 1/2 cup powdered sugar and extracts.  Add flour, lemon rind and salt, beating until combined.   Stir in coconut.  Cover and chill 30 minutes.
Shape dough into generous 1 inch balls; place on parchment paper (or silicone mat) lined baking sheets.   Bake at 350 for 15 to 20 minutes until golden on bottom but still pale on top.   Cool for 5 minutes.

Place 1  1/2 cups powdered sugar in a bowl and roll warm cookies, coating well.   You will have time to set the down and then roll them again (and again).   The more powdered sugar, the more they look like snowballs.   Depending on how big you roll your snowballs, the recipe will make 2-3 dozen.

Recipe from The Southern Living Big Book of Christmas

Monday, December 5, 2011

Good Cookies: Cranberry-Pecan Oatmeal Cookies

First, ask yourself:   Am I a Good Cookie?

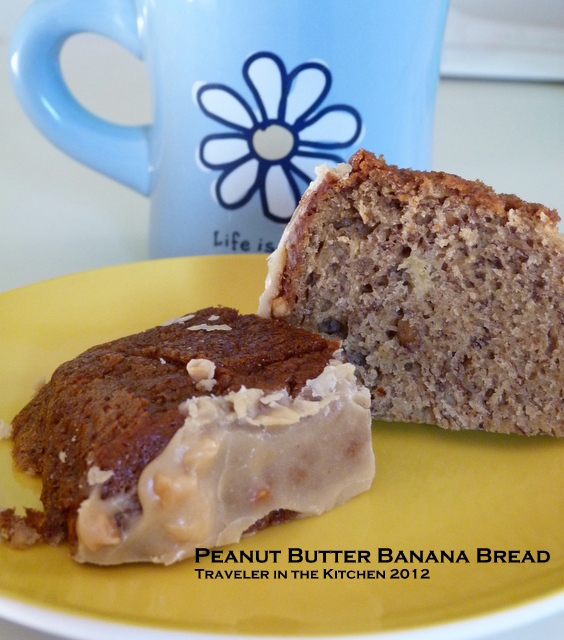
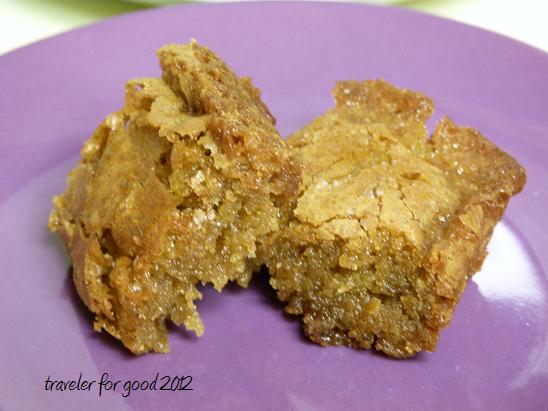
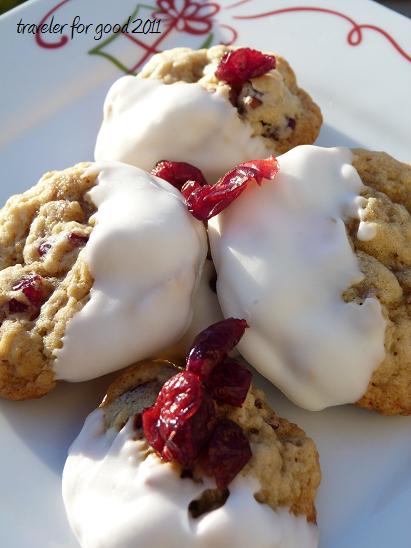
My Good Cookie of the Day:  Cranberry-Pecan Oatmeal Cookies
By nature most oatmeal cookies come with one unfortunate ingredient: raisins. I like raisins, by themselves, in a box. But not in my baked goods. Cranberries, however, are a different story. Obviously I need to cook with Craisins more often.
1 cup butter/margarine
1 cup firmly packed light brown sugar
1/2 cup sugar
1 large egg
1 tablespoon vanilla
2 cups flour
1 teaspoon baking soda
1/2 teaspoon baking powder
1/2 teaspoon salt
1 heaping cup Craisins (used the small 6oz package of Craisins - keeping a few for snacking)
1 1/2 cups pecan pieces, toasted
1 1/4 cups uncooked quick oats

Preheat oven to 375.

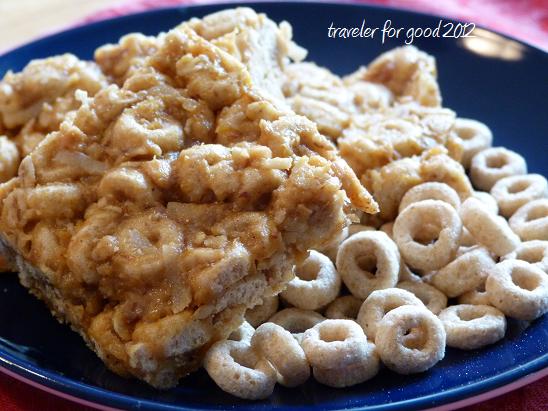
Beat butter/margarine on medium with an electric mixer until creamy, gradually add sugars. Add egg and vanilla, beating until blended. Combine flour, soda, powder, and salt and then add to the sugar mixture, beating until blended. Stir in cranberries, pecans and oats. Drop dough onto lightly greased cookie sheet (I used a silicone baking mat instead), 2 inches a part. Bake for 9 minutes (Colorado time). After the first batch, I put the dough in the fridge for a bit so that the cookies didn't spread quite as much.

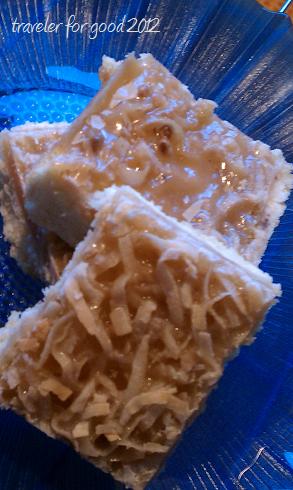
The fancy holiday touch: I used some white candy coating to dip the majority of the cookies. You just warm the coating in the microwave and stir until smooth. Dip half the cookie into the coating and let cool on wax paper.

Adapted from The Southern Living Big Book of Christmas


{The Giveaway below is long since closed, but OXO still partners with Cookies for Kids Cancer and it is a great cause}

What's With the Good Cookie?
Two OXO employees who had a child with cancer started Cookies for Kids Cancer .  It provides inspiration, ideas and support for people everywhere to help fight pediatric cancer - through the simple concept of local bake sales.  All over the country individuals and organizations host bake sales, with the proceeds going to Cookies for Kids Cancer to help fund more research for pediatric cancer.

6 Ways to Bake a Difference


1.   Send a virtual cookie.   No calories and no guilt.  OXO will make a donation for each e-cookie sent, up to 10,000 cookies per week.
2.  Find a bake sale near you and eat your way through it. 
3.  Host a bake sale.  
4.  Host a cookie exchange.  Glad will donate $0.10 per cookie exchanged or sold this December as a part of their Glad to Give program.
5.  A second no-calorie option: Make a financial gift online.
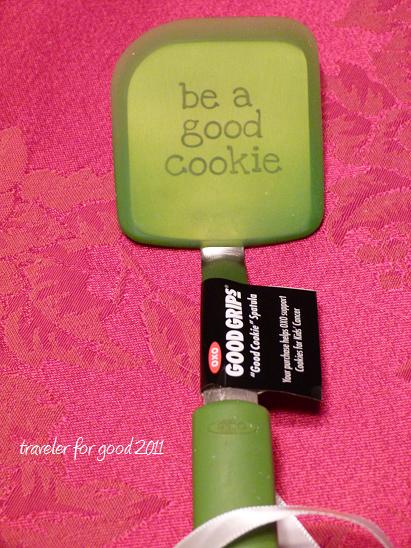
6.  Buy the OXO limited edition Good Cookie spatula. 


Giveaway!  {CLOSED}
The good people at OXO gave me two spatulas for free as a part of the OXO Blogger Outreach Database.   One of the Good Cookie spatulas was to use for my own Colorado baking adventures.  It makes me smile every time I see it.  Every cookie is a good cookie.   There is a second one for you!  Simply post in the comments your favorite Christmas / December treat.   It doesn't have to be a cookie.   It doesn't even have to be sweet.    Just what it is and who makes it (or where you can buy it).  

I will choose a winner using random.org on Friday December 16, so make sure you comment by Thursday.  Anyone can post, but I am limited to shipping the spatula in the US.   You may even have your spatula before Christmas depending on how fast FedEx Ground moves and how far away you live. 

Let your inner Good Cookie shine!

Sunday, December 4, 2011

Recipe: Mudslide Brownies


I love sweet cocktails.  I made it through college drinking White Russians and Amaretto Stone Sours (better than Keystone Light any way you look at it!).   A mudslide, to me, might have ice cream and chocolate drizzle in a glass.  By definition, it will have vodka, Irish cream, coffee liquor, and cream.  A calorie killer to be sure - probably just as bad as having a frappucino every day.  But it's the Christmas baking season.  You'll have plenty of parties and cookie exchanges where you can pass these off to your friends.  

What You Need 


6 oz unsweetened chocolate baking squares
1/2 cup plus 2 tablespoons butter/margarine
1 cup sugar
1 cup packed light brown sugar
3 large eggs
4 teaspoons instant coffee granules
2 tablespoons plus 2 teaspoons Irish Cream, I used Bailey's
1 1/2 cups flour
1/2 teaspoon salt
1 cup chopped pecans, toasted
2 tablespoons whipping cream
2 tablespoons vodka, I used Smirnoff Vanilla (from the Pumpkin Spice Martinis)
2 1/4 to 2 1/2 cups powdered sugar

Garnish:  Chocolate covered espresso beans, chopped.   I supported the local charity The Women's Bean Project and bought these beans at church.

What You Do 


Melt 4 chocolate baking squares and 1/2 cup butter/margarine in a heavy saucepan over low heat, stirring occasionally.   Remove from heat, and scrape into a mixing bowl.   Add sugars, stir well.   Stir in eggs, 2 teaspoons instant coffee granules, and 2 teaspoons Irish Cream.     Add flour and salt, stirring until blended.  Add pecans.    Spread batter, it will be thick, into a foil lined 13x9 pan lightly sprayed with cooking spray.  Bake at 325 for 25 minutes, Colorado time, or until brownies appear set on top.  Cool completely.

Frosting note:  When I made it, I did it while I was making other things, so by the time the brownies were cooled, it had gotten very stiff.   I just added some more whipping cream and was good to go.

Melt remaining 2 baking chocolate squares and 2 tablespoons butter/margarine in a heavy saucepan, stirring occasionally.   Remove from heat and put in medium bowl.  Stir in remaining 2 teaspoons coffee granules and remaining 2 tablespoons Irish Cream.   Add powdered sugar until it reaches a good spreading consistency, beat with an electric mixer.   Smooth frosting over brownies.   Garnish by pressing chopped chocolate espresso beans into the frosting.    These are sweet and rich, so you can cut them small if you'd like. 

Enjoy with a big glass of milk.

Adapted from The Southern Living Big Book of Christmas

LinkWithin